So, you just moved to Sakurajima on Mastodon or Misskey/Sharkey, but have no idea how to auto-share your new blog posts to Mastodon. There are currently two methods to do this. If you are hosting WordPress on your own server, Mastodon Auto Post is the best option. For Wordpress.com users, your only choice is sharing through Jetpack Social. A toot/note with a link to your blog posts is done instantly when you publish the post and you can add the post’s categories and tags to your toot for extra discovery.
If you are hosting your blog on Blogger, or Tumblr, your options are limited. You will need to use Mastofeed and use your RSS feed to accomplish this. This means no adding tags and categories as hashtags on your post, but they will get shared on Mastodon. We will teach you how to set up autoshare using both methods.
For Yoshino Garden users, skip the add plugins steps and activate the plugin in the Plugins section.
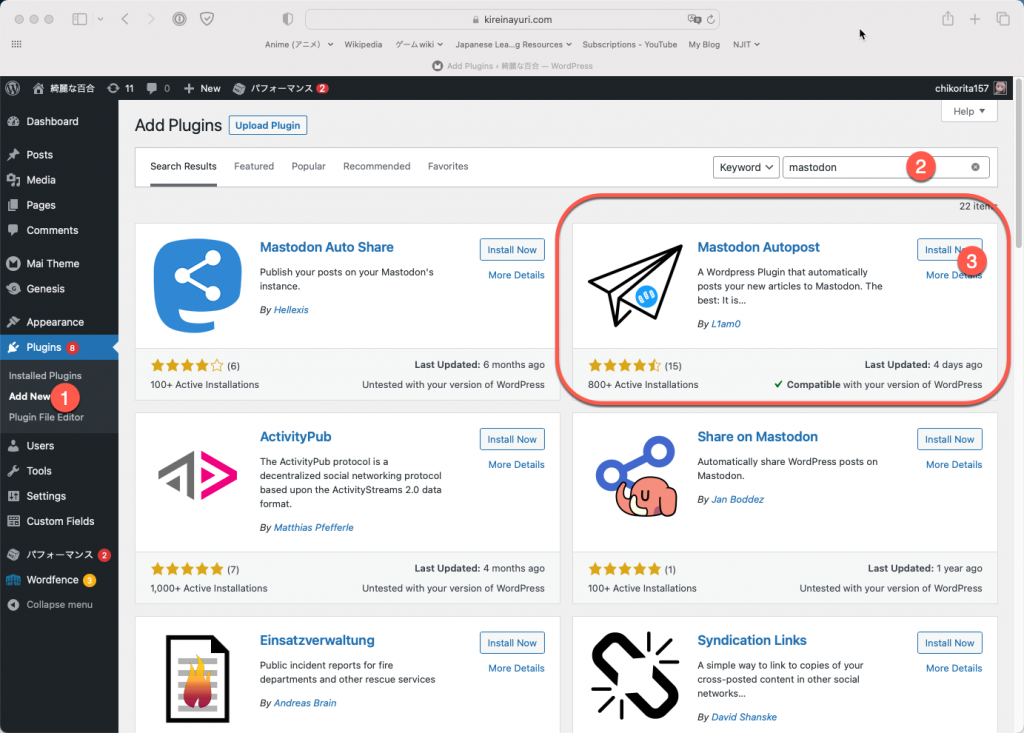
1. In plugins, find the Mastodon Auto Post plugin and install it.
2. Type Mastodon in the search and find the Mastodon Autopost plugin
3. Click Install Now and Activate
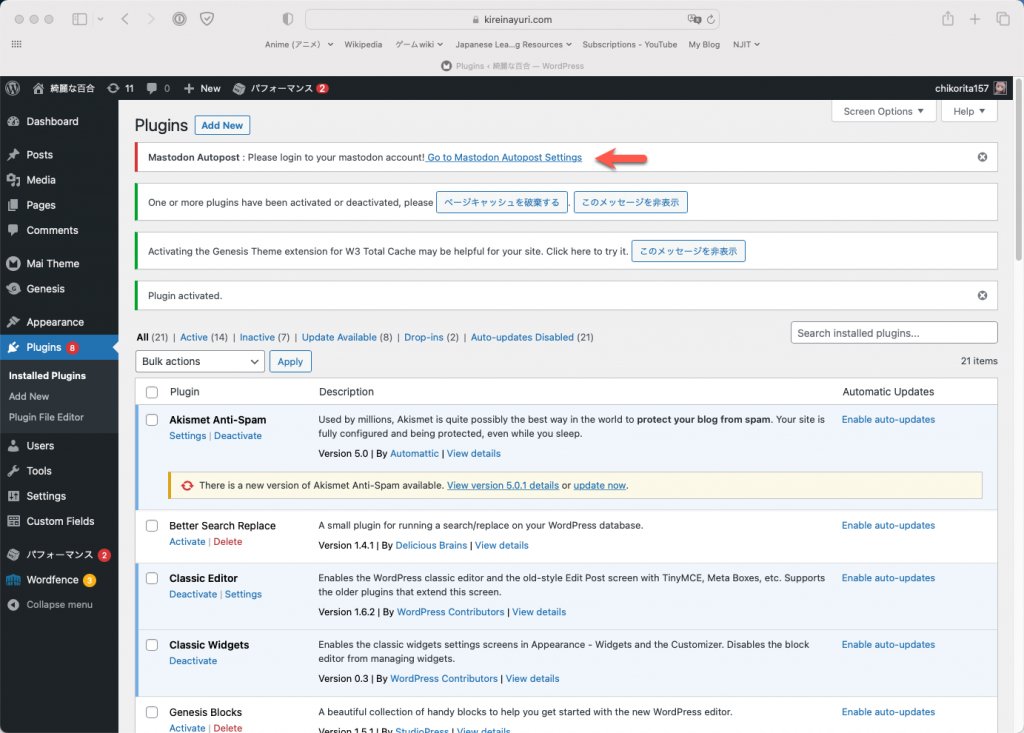
4. Click Go to Mastodon Autopost Settings or Settings > Mastodon Autopost to configure it
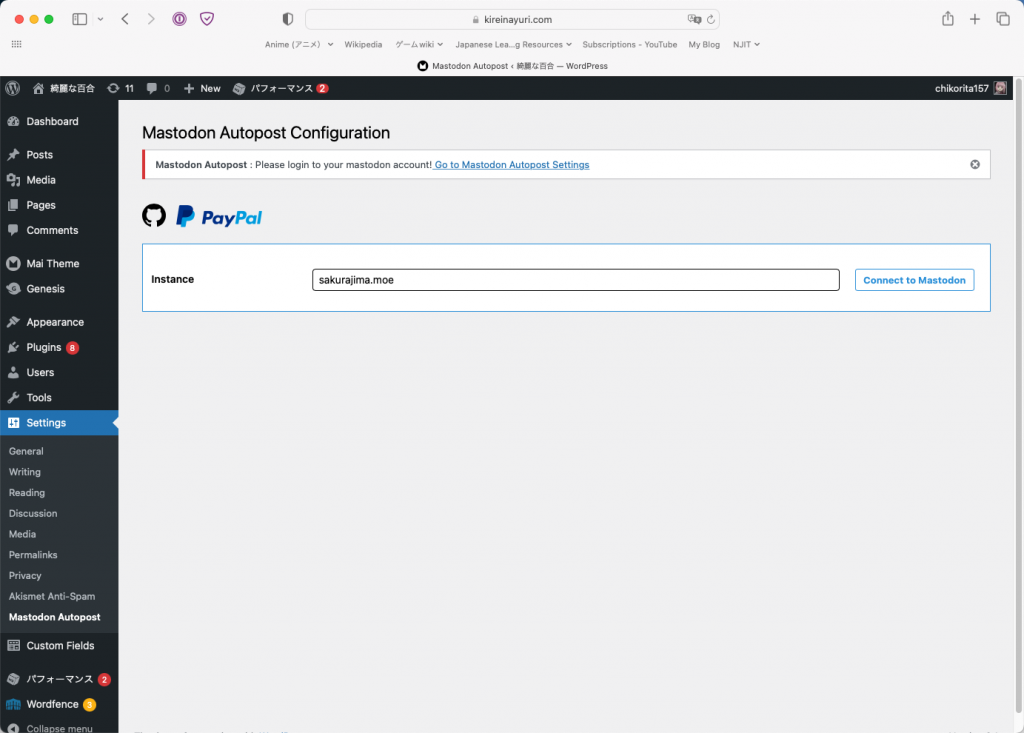
5. In the instance, type the domain of the server/instance your account is on. An example uses sakurajima.moe
6. Click Authorize
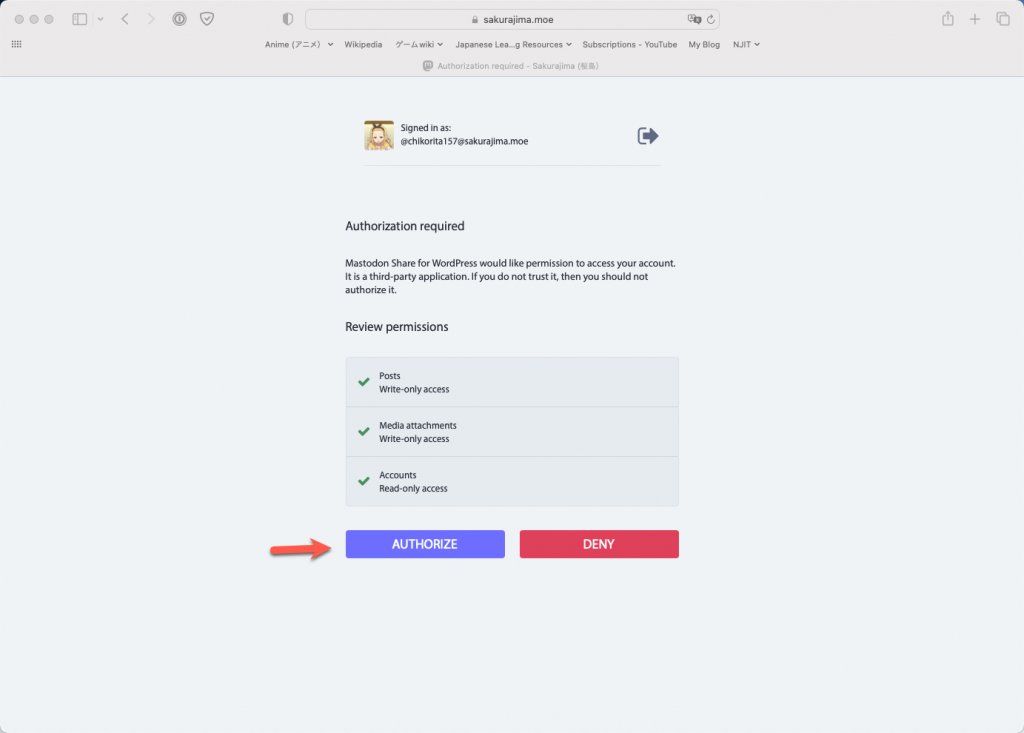
7. Now, select a message format, which the plugin will use to share the Post on Mastodon. You should uncheck Pages and Media as well. Once you are satisfied with the settings, click Save configuration.
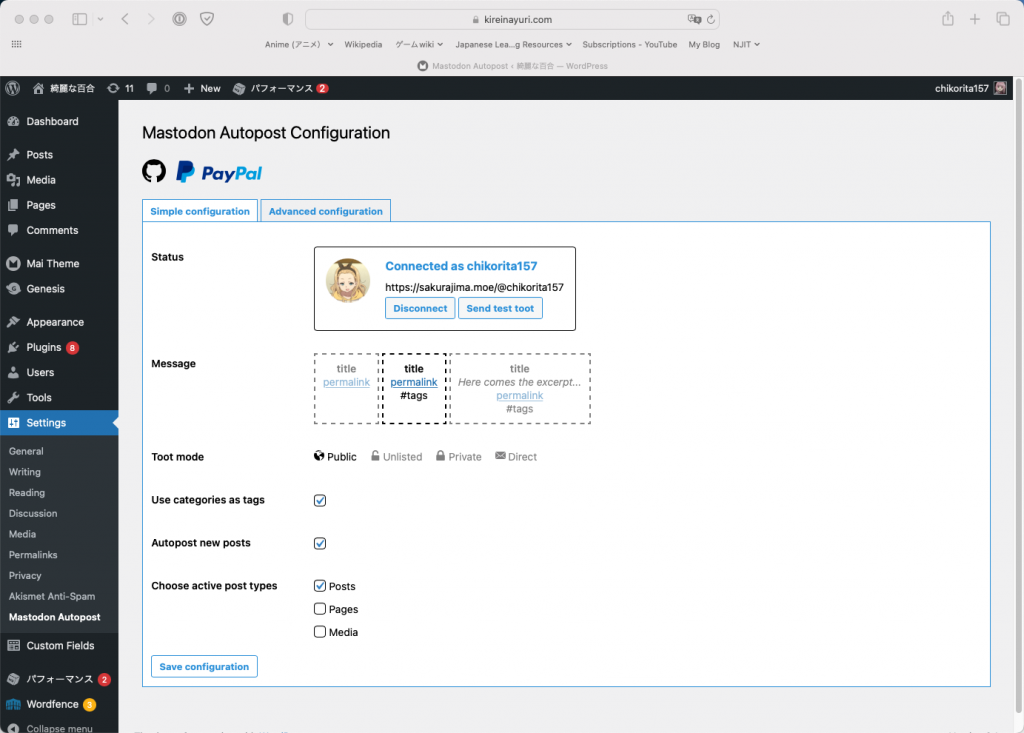
WordPress will now auto-share your newly published Post on your Mastodon account.
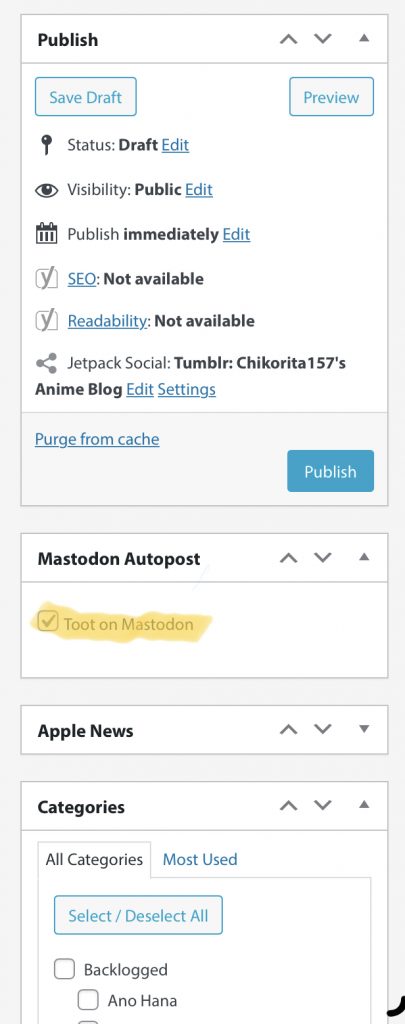
If a toot is not being made when you publish your blog post, check to see if Toot on Mastodon is checked before publishing the post.

1. Go to the Wordpress.com dashboard. Click Tools and then Marketing.
2. Click Connections
3. Under Mastodon, click the arrow and enter your Mastodon username. Click Connect account. Once you authorize your account, it should start autoposting.

Mastofeed is a service that autoshare your blog posts to Mastodon using an RSS feed.
1. Go to Mastofeed.org and type the address to your instance. If you are on sakurajima.moe, type that in.

2. Click Sign in with Mastodon
3. If you are not signed in, you will get prompted to sign in, You will see a prompt. Press Approve to sign into Mastofeed.

4. Click Add a New Feed button

4. Specify your feed and click add. For WordPress, the main blog feed will usually be at https://(yourblogaddress)/feed. For other platforms, you can usually find a RSS link to your main feed.

5. You are done. You can edit the feed by clicking the edit button to modify how the toot will look when a new blog post is detected. In the edit option, you can delete your feed from Mastofeed as well.

If you are hosting your blog on Blogger, or Tumblr, your options are limited. You will need to use Mastofeed and use your RSS feed to accomplish this. This means no adding tags and categories as hashtags on your post, but they will get shared on Mastodon. We will teach you how to set up autoshare using both methods.
Mastodon Autopost (for Self-Hosted WordPress (including Yoshino Garden) and Wordpress.com plans with Plugin capability)
Works with Mastodon and Sharkey.For Yoshino Garden users, skip the add plugins steps and activate the plugin in the Plugins section.
1. In plugins, find the Mastodon Auto Post plugin and install it.
2. Type Mastodon in the search and find the Mastodon Autopost plugin
3. Click Install Now and Activate

4. Click Go to Mastodon Autopost Settings or Settings > Mastodon Autopost to configure it

5. In the instance, type the domain of the server/instance your account is on. An example uses sakurajima.moe

6. Click Authorize

7. Now, select a message format, which the plugin will use to share the Post on Mastodon. You should uncheck Pages and Media as well. Once you are satisfied with the settings, click Save configuration.

WordPress will now auto-share your newly published Post on your Mastodon account.
If a toot is not being made when you publish your blog post, check to see if Toot on Mastodon is checked before publishing the post.
Classic Editor

Block Editor

Jetpack Social
Only works with Mastodon, does not work with Sharkey. Functionality is limited to 30 shares without a paid plan, only recommended for WordPress.com users.1. Go to the Wordpress.com dashboard. Click Tools and then Marketing.
2. Click Connections
3. Under Mastodon, click the arrow and enter your Mastodon username. Click Connect account. Once you authorize your account, it should start autoposting.
Mastofeed (Post with an RSS feed)
Works with Mastodon and SharkeyMastofeed is a service that autoshare your blog posts to Mastodon using an RSS feed.
1. Go to Mastofeed.org and type the address to your instance. If you are on sakurajima.moe, type that in.
2. Click Sign in with Mastodon
3. If you are not signed in, you will get prompted to sign in, You will see a prompt. Press Approve to sign into Mastofeed.
4. Click Add a New Feed button
4. Specify your feed and click add. For WordPress, the main blog feed will usually be at https://(yourblogaddress)/feed. For other platforms, you can usually find a RSS link to your main feed.
5. You are done. You can edit the feed by clicking the edit button to modify how the toot will look when a new blog post is detected. In the edit option, you can delete your feed from Mastofeed as well.
